Thursday, December 25, 2014

Merry Christmas

Well another Christmas has come and almost gone. It was a really lovely holiday season with our family.
As usual, we had many places to visit. Last night we went to my Aunt's house in Floresville, Tx that is on my Father's side of the family. That is where these beautiful sunset photos of my guys were taken. I love a good Texas sunset. As you can tell it is beautiful and peaceful country. I love being outdoors and away from the from hustle and bustle of the city because I always find that being around nature brings me peace. There is a certain harmony and balance in nature that always reminds me to just be and let it be. 
This is the kind of "White Elephant" that you hope to end up with at the end of the night. Every time I participate in a white elephant, I tend to bring alcohol of some sort. No one ever turns down a gift filled with little bottle of booze, chocolate, a few mints and a delicious all-natural peppermint lip balm. No One!!! I wish I would have just kept this bag for myself. That is the fun of the game!
I made homemade marshmallows for the first time and I must say that it was the messiest and stickiest thing that I have ever made. That means that they were super yummy. I made up a big cup of hot cocoa full of milk chocolate and white chocolate chips in one of my old Starbucks mugs. I plopped in a few extra big and fluffy homemade marshmallows, sprinkled with a little cinnamon and enjoyed one of the best cups of hot chocolate that I have ever had. I mean that thing was good. I used the Alton Brown marshmallow recipe that has been circulating around everywhere. It was a good but super messy first experience. I plan to make these again and fix a few of the mistakes I made in this recipe. All I can say is they make for one good cup of cocoa.
Also, for Christmas I tried my hand at homemade vanilla extract. I never knew how easy it was to make your own extract. I don't think most people know just how easy it is to make either. I really loved these cute little brown glass bottles that I got and I just found some cheap labels and a ribbon assortment at Hobby Lobby and threw these little guys together. Everybody loved them. I got to learn to make something new. I got to save money and I was able to give my friends and family something that I put my heart into and It felt good sharing with them. I will continue to make my own extract from here on out.
We started a tradition of decorating a gingerbread house as a family last year. We did it again this year and It was fun as usual. The icing they include in these little kits is pretty damn good. I have a hard time not eating it. The kit we found this year was way better and came with two gingerbread men as well as a tree and a few other extras that helped make our little house so awesome and yummy. Decorating a gingerbread house as a family is a great way to spend some extra time together and get creative as a family. Everyone will be so proud of the result. Then maybe everyone can eat it.
Now onto New Years Eve. Hopefully a little dancing and celebrating another year of health, happiness and love. Merry Christmas to everyone from my family to yours.
 
Blessings and Love to all
 

Sunday, December 21, 2014

Cinnamon Rolls from Heaven


I always wanted to make cinnamon rolls from scratch but was a little intimidated with the task. The amount of time that I thought would have to go into making those gooey little buns was daunting. I put it on my list of things I want to learn to make from scratch and kind of forgot about it. That was until I came across this recipe that seemed too good to be true. There was an easy video tutorial to follow along with and everything. Score! I really like the lady who made the video. Her name is Jenny. She's a pretty woman, probably in her 60's, quirky, blonde and for some reason seems so familiar to me. You want to know why this woman seemed so familiar to me? 
Because she is Jenny Jones.


The former talk show host Jenny Jones. I learned how to make some of the tastiest and easiest cinnamon rolls ever from a former 80's & 90's drama talk show host. I didn't even know she had a youtube cooking channel. Did you know? I think I like her better as a cooking show host than the other.

After I stopped saying, "No wonder she looks so good, It's Jenny Jones" then I was able to focus on making these yummy buttery rolls. Not only is this recipe fairly easy to execute but she has cut out about half the butter and sugar of your regular cinnamon rolls. I would have made them and totally enjoyed them even if she had doubled the butter and sugar, but I honestly was just as satisfied with these and can't complain. I don't think you will notice either. Just think of it as a gift to yourself.

To make it a little easier I have gone ahead and laid out the basic tools and ingredients that you will need to make these fabulous ooey gooey sticky sweet rolls but I think you will find it most helpful to follow her 15 minute instructional video to get the full grasp on what is supposed to go down. Besides, you need to go see Jenny Jones do a cooking show. It is wonderful. Actually I find her very relaxing and kind of funny. Especially now that I know who this random Jenny Can Cook gal is.

What you will need:
TOOLS
Stand Mixer (works the best)
Measuring cups and spoons
large bowl
silicone spatula
8" round baking pan
Floss if you got it (or large knife)
plastic wrap
rolling pin

Ingredients
DOUGH
1 1/2 c. Flour + 1/4 c additional flous
1/4 c. sugar
1/2 tsp. salt
1 pkg yeast
1/2 c. warm milk
3 tbsp. Canola Oil
1 egg

FILLING
1/4 c. Brown sugar
2 tsp. Cinnamon

GLAZE
1 c. Confectioners Sugar
1/4 tsp. Vanilla Extract
2 tbsp. Milk
milk

*I added 2 tbsp. cream cheese and 1 tbsp. of butter to my icing. What can I say? I love a rich creamy cream cheese frosting. Just a suggestion!


You can find the recipe and video tutorial here and watch how easy it is to make these big, yummy, fluffy cinnamon rolls all by yourself. I would watch the video once all the way through and take it all in. Then, you can prepare everything and when you are ready you can follow along with the video again while you are actually making them. I hope you get the opportunity to check out the video and Jenny as well as try out this recipe. It is a great one. Enjoy your journey in the kitchen. If you're not having fun then you are not doing it right.

Blessing to all


Monday, December 15, 2014

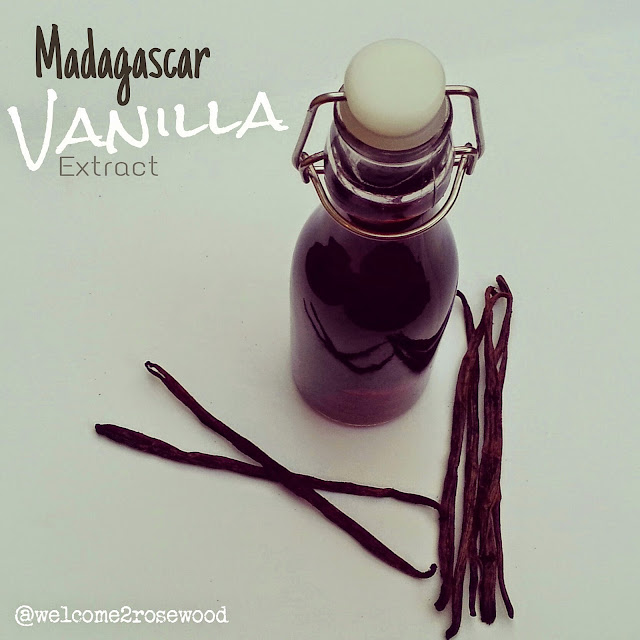
Vanilla


I ordered some Madagascar vanilla beans a few months ago. Every time I go to the store and see those glass jars with the one vanilla bean for $10 I am like,
"I want some vanilla beans". But not for $10 and not just one. So I found this awesome vanilla bean company online and ordered me some beans.
THEY SMELL SO GOOD!!!
As soon as I opened the package, I knew I made the right choice to purchase these bad boys.  
 
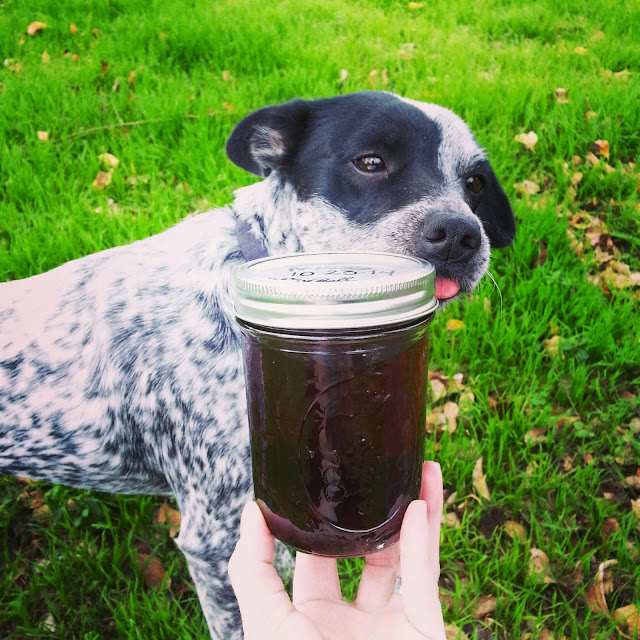
Bailey stamp of approval. You know it's good!!!
 
 
I knew I did not want these precious little heavenly beans to go to waste, so I started researching things to make with them. There are a lot of homemade goodies to make with vanilla beans. Homemade vanilla ice cream, where you scrape the seeds of the bean into the ice cream while it is churning and it is oh so yummy. Done that! Vanilla bean sugar scrub. Want to do that! Plan to do that. I have planned to make a special holiday vanilla bean lip balm. I can't wait for that. I already know that is going to be lovely. But Vanilla Extract? Something I use all the time. I can make my own? Vanilla Extract is perfect. Just in time for the holidays.
The recipe is so simple. Who knew that you could make almost anything into an extract. Not anything but a lot of things. All you need is vanilla beans and alcohol. Specifically Vodka or Bourbon.
 
The process takes anywhere from 4-6 weeks or longer. My vanilla has already been brewin' up for 7 weeks now. The longer the vanilla beans soak in that bourbon bath (or vodka) the stronger your vanilla is going to be. The vanilla has to be stored in a dry dark and cool area. Certainly not in the sun like it is in my pictures. I just took my vanilla on a little adventure for picture purposes and approval of course.
 
This is how I made my Vanilla Extract
 
What you will need
Mason Jar with lid (or similar vessel)
Paring Knife
16oz Bourbon or Vodka  (the higher quality alcohol, the higher quality extract)
6 Grade A or B Madagascar Vanilla beans (or Tahitian)
 
First, pour the bourbon into the mason jar. Then, using your paring knife make a slit down your vanilla bean length wise, starting from 3/4 of the way up and working it all the way down to the end. Again, run the tip of your knife down the inside of the pod from top to bottom and scrape out the seeds of the bean. Put the seeds in the bourbon as well as the bean. Do this to all 6 beans.
Screw the lid on tight. Label the top with the date that it was made. It is easy to forget how long the extract has been fermenting, so writing it down helps. The only thing you have to do now is give the jar a little gentle shake and store it away. Again, it is important to not leave the vanilla sitting out in a sunny place or cold or hot or wet. Store it in the pantry or somewhere dark and safe. Let the little angel get it's beauty rest. She's gonna need it.
I just go in every couple of days or so and give the jar a little rocking. You don't have to do it as often. Once a week is fine. I just get excited watching something come to life. Yes, something as little as a delicate jar of sweet vanilla extract.
 
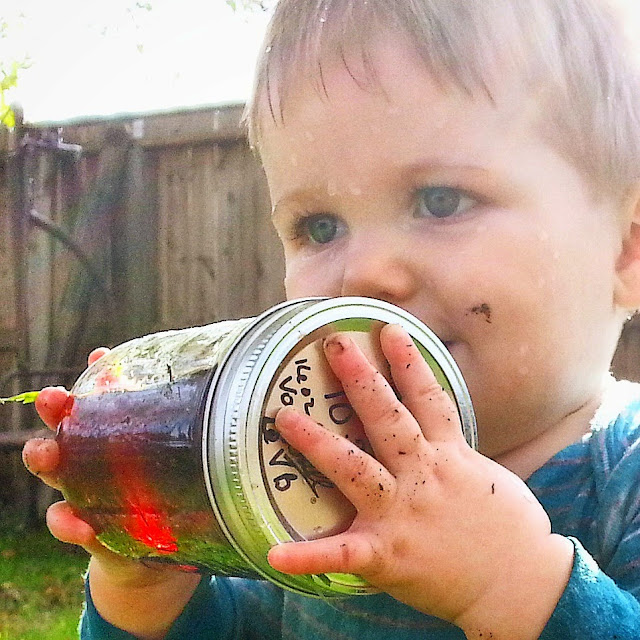
Jaxon approved too!
He wanted to give the vanilla a little shake too after playing in the rainwater barrel. That is the kind of love that went into this batch of vanilla extract
 
Blessings to all
 

Sunday, December 14, 2014

Pretty Petit Fours

These little Alice in Wonderland inspired petit fours are so light, airy and delicious. They literally melt in your mouth. Ok, so before you get too excited about this, I don't have a recipe ready for these delicious little tea cakes. I just love them so much that I wanted to share them and could not wait any longer. I will of course try to get one together.

I remember watching Alice in Wonderland when I was a little kid and seeing Alice eat that precious little blue round cake that said, "Eat Me" on it. I was like, "I want a bite" lol. Then she grew like 20 feet tall and broke through the roof. But I still loved the way that lovely little bite sized cake was stored perfectly in that little glass box and it all just seemed so magical.

I have also always loved petit fours and tea cakes and wanted to make my own. I have attempted making petit fours a couple of times before and they can be a little tricky. I will say that what worked best for me was making a large sheet cake and using a small round cookie cutter to cut out the little cakes. Then I used a light glaze and smothered them over a grated cookie rack.

My favorite part about making sweets like this is the creativity that happens. It is like food art.
IT IS Food Art!
I love food and I love art. It is a win win. I have been passionate about food and art since I was very young. So to get to combine the two is really fun for me. I like to write inspirational sayings on my food sometimes too. Like Love. I write that one a lot, lol.

I will do my best to get a recipe together for these as soon as possible. Let these be inspiration as to little cakes to come. As always, Enjoy your journey in the kitchen. The more you practice, the more you learn. It is a blast either way.

Blessings to all


Saturday, December 13, 2014

Orange Julius copycat recipe

Remember those delicious Orange Julius smoothies that Dairy Queen used to make? They stopped making them for years and then in the past couple of years they brought them back but they don't taste quite the same. I am not sure if they changed the recipe or did something different but something is definitely different.
 
I always loved the Orange Julius and have attempted to make my own on several occasions. They didn't always come out so great but never so bad that I didn't drink them. I have searched high and low for the perfect copycat recipe for making my own Orange Julius and I finally found some good ones. There are a lot of these out there. The general ingredient seem to be pretty common among all the recipes that I have found. I did find this one on Pinterest from The Recipe Critic that I liked in particular. I had to do a little tweaking to make the recipe just how I wanted it and this is what I ended up with. I hope you like it.
 
Recipe
What you will need:
Blender
Spoon
Cups
Straws
Measuring cups
Measuring Spoons
 
Ingredients:
6oz frozen orange juice concentrate (half a can)
1 cup milk (try 2% or skim for a healthier version)
1 cup cold water
1/3 cup sugar or (sugar alternative)
1/2 tsp vanilla extract
10-15 ice cubes
Makes about 4 - 8oz glasses

This is such an easy recipe and all in all not too fattening. If you use a less fattening milk (or milk alternative) and less sugar (or a sugar alternative) then this can really be a healthy. I don't mind the few extra calories and I want my Orange Julius to taste as close to the original as possible, so I use the original ingredients. 
 
To make the smoothie, combine all ingredients into your blender and mix until smooth. It should take a couple of minutes. I use the ice crush button on my blender because I don't like chunks of ice in my smoothie. Use your spoon to taste and make sure it is sweet enough or thick enough for you. Most recipes called for more sugar, about half a cup. Also, less ice. I found that I like mine with a little less sugar and a little more ice. 

If the Orange Julius Smoothie meets your standards, then pour into glasses, add a straw, maybe a little orange garnish and go to town. 
Yum!!!
Well, I hope that your Orange Julius experience is as good with this recipe as it was way back when the original Orange Julius was around. If you find that it doesn't quite fit the bill then tweak the recipe a little until you find your own balance. That is what is so fun about cooking and playing in the kitchen, you get to be creative. 
 
As always, Enjoy your journey in the kitchen!
Blessings to all

Wednesday, November 26, 2014

Texas Teas: The good kind

Texas! You either love it or hate it. There is rarely ever an in between. At least that is the consensus that I have gathered. You may already know that I am from Texas. You may also have heard that Texans are prideful people. This is true.

Just in case you are one of those who maybe didn't fall in love with Texas, allow me to change your mind with a beverage.
The Texas Tea
You didn't know we had a tea did you? This isn't grandma's sweet tea that sat out brewing in the hot Texas sun all afternoon. This is the kind of tea that has no tea at all. You heard me right.
A Texas tea with no tea.
This is the kind of tea that makes you feel warm and happy inside. Maybe on the outside too!

I hope after you drink this delicious and sweet Texas Tea , you may find that there is at least one thing you can like about Texas!

Since we are in the midst of the holidays and everyone seems to like a good cocktail or hot toddy if you will, why not try out a new drink to celebrate.

I have had my share of Texas Teas from various places and not all are created equal. Some tasted nothing like a Texas Tea and I think some of the bartenders didn't even know how to make one.


I am here to spread it's greatness and make sure that the proper ingredients are being used in the recipe.

Ingredients:
2oz Tequila
2oz Rum
2oz Vodka
2oz Gin
2oz Bourbon Whiskey
2oz Triple Sec
2oz Sweet & Sour Mix
Splash of Coke

To make:
In a gallon picture over ice mix all of your ingredients except the coke and stir. Add the splash of coke and stir again. Pour over ice into individual glasses and enjoy. Sometime I like to add a tasty rim to mine with a little lime juice and sugar. It just makes it a little more fun

This recipe makes four small drinks or you can make 2 larger glasses. I like to go ahead and pour the tall glasses because I know I am going to drink it. Why play games with myself? These drink are very strong and dangerous. How can a drink be dangerous? Because they are that good. So good that you sucked down the whole drink in 5 minutes and 5 minutes later you are feeling how much you drank. So if you have never had one, try taking it slow the first round.

You may be thinking that a Texas Tea is a lot like a Long Island Iced Tea and you'd be right. It is exactly like a Long Island Iced Tea except the Texas Tea has Bourbon/Whiskey and is way better. The measurements are slightly different as well.

I don't need to convince you. Try it out for yourself and let me know what you think.
You won't change my mind but I might just be able to give you one more reason to Love Texas.

Happy Holidays my friends and enjoy.

"Don't forget to drink responsibly and never drink and drive."
That is my little P.S.A.

Blessing to all

Saturday, November 22, 2014

Transformation: Old into New


Lately I have been feeling like I have too much stuff in my life. Literal stuff. I have a small house and 13 years of accumulations scattered about in my bohemian laid-back style. I have been collecting things since before I was even out of high school. I have gotten rid of a lot of items over the years but I have also taken in several more. It's a constant cycle of furniture and nicknacks revolving through my doors. I'll get rid of that but Ooh I'll take this. I have to cleanse!!!

I have a tendency to take on other people's things. I am notorious for telling people in my family, "I love this piece. If you ever decide to get rid of it, I want it. So remember me." You know what? They always remember. "Stacee wanted this." Then I get the call and I become the new owner of giant overstuffed black couches, great-grandpa's antique chest, grandpa's rocking chair and my best friend's grandmother's exquisite buffet table. I mean this thing is good.
 
That is only the beginning. I love to repurpose and reuse. I can see the potential in almost anything. My house for instance took a lot of imagination and so far 8 years of constant transformation to become what it is today. She was built in 1961. I know that is only 50 years old but houses weren't built that well 50 years ago. Funny how century year old castles have more staying power than my tiny bungalow style pad.
 
Anyhow, the stuff. It is easy for me to let people give me their stuff when they are done with it because I love having items that have a history and I don't like to turn things away. Especially if It came from family. Also, I have always had a fondness of picking out items in people's trash cans that I know for a fact are not trash. They just need a little TLC and touching up. As you can see I provide the perfect environment for furniture and various items to accumulate.
 
All this accumulation of stuff has left me feeling weighed down and cluttered. I feel the need to cleanse and purge. I don't get this feeling to often. So I am going with it. As I have been going through my house and picking out the pieces that I simply don't use and really don't need, I make a pile for a future garage sale. I am doing pretty good with getting rid of tons of the tiny things like extra clutter in the kitchen and bathrooms. During this process of change and transformation, I have decided that some of the old things I have decided to keep need a transformation of their own. So I have started to take these items and give them a fresh coat of paint or new look all together. I still have a lot of items to make over but I have started with these and I am pretty happy about it.

 I really wish I would have gotten a picture of this chair before I started painting it but I was quick with the can and before I remember I was almost already done. I found this chair in someones garbage about a year ago and besides having a hideous paint job, it was in great condition. These are the good solid Adirondack chairs. They are sturdy and last. I just used a can of Rustoleum Painter's Touch 2X ultra cover paint and primer spray paint in satin colored Lagoon. I got a great color and coat and only had to use one can. I am really happy with the color and I don't think my camera even captured the full rich and penetrating blue that is this color. It certainly makes me happy.  

 I also have this long wooden table in my bathroom that is just....plain! I absolutely love the look of a darker wood with a beautiful bright blue or turquoise. It reminds me of island living and the rich colors you find in a lot of island cultures. It feels like home.
All I did to this table was sand it, stain the top and sides with a dark stain and then I painted the legs a bluish turquoise color. I love it. It is very easy to turn a simple plain table into something beautiful and personal without having to go out and spend $100 on a brand new one. I think there are enough pieces of furniture already manufactured and floating around the world just waiting for someone to make them like new again. Wish me luck on getting rid of more than I keep.

Ruin is a gift. Ruin is the road to transformation." — Elizabeth Gilbert

To decluttering and transformation 
Blessings to all
 

Friday, November 21, 2014

Make your own Christmas ornaments

For the past 6 years or so I have been using the same old red, gold and silver nautical stars and spiral ornaments that never fail to leave glitter all over my floor and kids. This year I decided that we needed a change and would do something totally different. I am not one to go out and drop $200 on a whole new ensemble for my tree. So I did what any one would do and I decided to make my own Christmas ornaments.


Not only do I get to save money but It is also a great way to get the kids involved in a fun family project. We had so much fun making these cute little ornaments that I have decided that we will make it a yearly tradition.

In the past I have used a salt dough recipe to make things such as this but I was doing a little scientific research on Pinterest and I found this new recipe popping up consistently. So I decided to give it a shot. This recipe for clay only uses three ingredients. Cornstarch, baking soda and water. I found it to be a really easy recipe and not too messy.

So this is what you will need to make this dough recipe and how to make it.

1/2 cup Cornstarch
1 cup Baking Soda
3/4 cup of Water

You will also need:
a medium saucepan
a silicone spatula (or stirring/scraping utensil)
a bowl and tea towel
silicone sheet or parchment paper
baking sheet
paints and decorations
1 drinking straw (It's to make a hole to hang your masterpiece)
String/yarn/twine

Preheat oven to 175 degrees Fahrenheit.

First, combine all three ingredients into your medium saucepan and cook on medium-low heat, stirring constantly. Once the mixture has combined and come together in a thick mashed potato-like consistency. It usually takes about 7-10 minutes for the dough to thicken. Once it gets to that state then you can transfer it to a bowl and cover with a tea towel and allow it to cool to room temp before handling.
 

After the dough has cooled you can transfer to a clean counter top and knead to get all the lumps and air bubbles out. If the dough is a little sticky then you can add a little corn starch to it. Roll the dough to about 1/4 inch thick and use cookie cutters to cut out your ornaments. Don't forget to use the end of a straw to punch out little holes to hang your ornaments. Transfer the shapes to a silicone or parchment paper covered cookie sheet and bake at 175 degrees for an hour, turning over once halfway through. Once they come out and have cooled, you can decorate and paint them. Add your string of choice through the hole in the ornament and tie it in a knot. Now you can hang your special ornaments on your tree and enjoy them for years to come.

Some other great ideas to try out when making your ornaments are carving initials and names into them. You can also use stamps to put impressions on them. You can add beads and glass pieces to them as well. Also, try spray painting them using stencils.

As always, have fun in the kitchen and I hope that you enjoy this recipe and make it a tradition in your home.

Blessings to all

Thursday, October 16, 2014

Pumpkin Buttermilk Muffins w/ a Brown Butter Maple Glaze

Yes! Fall is here and that means all the bakers out there are whipping up their favorite seasonal goodies of pumpkin and spice. I usually make a pie or a pumpkin cheesecake, which is always a hit. I love pumpkin just as much as the next but I get tired of making the same old pumpkin recipes every year. So I went in search of a recipe that was something special. Something I had never made before.
 
As usual I set my sights on the endless inspiration that is Pinterest.  I knew that If I was going to find something new and different, that Pinterest was where to start. It didn't take long and I came across this recipe for 
Just the name makes my mouth water.
You can find the recipe for those donuts by clicking on the link above. I used the same recipe for the donuts but made mini muffins instead. I had some extra buttermilk in the fridge that needed to get used and then I came across this donut recipe and the stars aligned. However, I did not have a donut tin to use and knew that time was not on my side (or the buttermilk's) and knew that I wanted to eat one of those donuts. So I did the next most logical thing and simply used mini muffin tins. If you have a donut tin already then I would certainly check out the donut method too. But if not then don't let something as silly as a shaped tin stop you from making magic.
MAGIC
 
That is exactly what happened when I made these muffins. Pure pumpkin mapley sweet magic.
I assume that had they been in the form of a donut they would have been just as delicious but I cannot speak on that.  I can say that these little muffins were light and airy yet moist at the same time. Not too sweet. Just the right amount of pumpkin and the buttermilk added a rich and light element that produced perfection in this recipe. The glaze added a little something extra but I would have been happy to eat just the pumpkin muffin without the glaze. THEY WERE THAT GOOD!
 I had a little batter left over from the mini muffins and just made a few regular sized muffins to eat for breakfast with my coffee.
 
Since this was my first time making this recipe or a baked donut for that matter, I didn't want to experiment or tweak the recipe. I played it safe and it paid off. However, this is a very versatile recipe and you could use it to make a variety of items. Let your imagination run wild.
I recommend trying out this pumpkin recipe if you are looking for something different this Fall season. I think I am going to try this recipe out in a pumpkin loaf next time. There really are a lot of possibilities. Go over and check out the recipe from the café sucre farine, where they have lots of yummy recipes.
 
As always
Enjoy your journey in the kitchen
 
Blessing to all


Saturday, October 11, 2014

Hail Curls!!! How to love your curls

I naturally have curly wild hair. When I was younger I didn't like my curls so much and they didn't like me either. My hair was always a mix between frizzy curly locks and an afro of tangled mess. I never understood why I was being tortured like this. Why does my hair have to be so wild and unmanageable? If it was humid outside at all my hair would double in size and frizz. I knew that I liked curls. Other women looked beautiful with their curls but mine didn't look so beautiful. Needless to say, my hair in my childhood was a pain in the butt.

It wasn't until I got older that I truly appreciated the art of the curl and learned how to cultivate the most beautiful of curls. I had to do some experimenting and learning when it came to handling and styling my God-given locks. I learned many things about curls and taking care of hair in general.


First, I learned you have to love your hair. No matter what kind of hair you have, you should LOVE it, but especially the curls. Not all curls are created equal but they are all sensitive to normal hair care routines. Curls need extra special love and attention. When my sister or girlfriends want to scrunch their hair and ask how I always get mine to look the way they do, I tell them,
be gentle and love the curls.

Let me clarify. Curls tend to be a little drier than the average head of straight hair. Curls need a little extra conditioning and nourishing treatments. It is important to not wash your hair with shampoo to often because it can lead to dry hair. Second, curls need a good conditioner when you wash your hair as well as a good light-weight leave in conditioner. When handling your curls or wet hair, you have to take care to be extra gentle and not toss your hair about like a normal head of hair. You can't just put your hands in your curls and toss them around without purpose.

After you get out of the shower and your curls are still wet, use a comb, hair pick or your fingers to detangle your hair. Do so gently and don't comb too much. You don't want to use a regular brush on your curls because it can brake your hair more easily and in general it affects the integrity of the curl.

After you have combed out the tangles, gently toss your head of hair over and use a really good leave-in conditioner or mouse/gel. This is where it really counts to be gentle. With my product spread on my hands, I gently cradle the ends of my curls in the palms of my hands and softly scrunch the curls towards my scalp and gently close my hands around them and gently release. I do this a few times until I feel like I have given every curl a good scrunching and that the product is evenly distributed. I try to keep product away from my roots because it can weigh down your hair even more.

Now that your hair is scrunched, you can flip your head back over to the upright position and use your fingers to twist and manipulate the curls around the crown and frame of your face. This is just a little something extra to make sure that your curls dry how you want them to.

Next, you can simply let you hair dry naturally or you can use the help of a blow dryer. If you choose to blow dry your curls, I would only use a blow dryer if it has a diffuser attachment. The diffuser will ensure the best looking curls. It keeps your hair from getting too dry as well as provides indirect heat so that your curls don't get blown to smithereens. You can gently throw your hair back over and start blow drying the curls from underneath first, since they take the longest to dry and this will add a little extra volume. Now flip your hair back over and again manipulate the curls in front and blow dry any other curls by gently cupping and scrunching them as you dry.

As a last touch I like to use a anti-frizz hair serum or Moroccan oil. I rub about a dime size in the palms of my hands and gently scrunch the ends of my hair all over, paying attention to avoid the scalp. This will add an extra barrier from humidity and add a little extra shine to your curls.

If you have curls, you know exactly how challenging it can be to get the most out of styling them.
Curly hair is beautiful and a blessing, I have learned. All you need is a good routine for fixing your lovely curly locks and life seems to be right again. I hope that this helps anyone looking to make their curls more beautiful, bouncy and manageable. I wish I knew how to take care of my curls when I was a young girl and looked like Little Annie. But now that I do know, I want to share it and I wish you luck. Love your curls and they will love you back.

Blessing
 

My Pumpkin is turning 8

I remember the day he was born like it was yesterday. After being 13 days passed my due date, 18 hours of labor and a c-section, I met the most beautiful baby I had ever laid eyes on. 9lbs 9.5oz of bouncing beautiful baby boy with a full head of dark hair and big brown eyes. "He is perfect", I said.

Handsome Happy Baby
 
He took his time and came out healthy and happy. He has always done things his way and marched to his own beat. I love that about him.
 
He has grown up fast and It's hard to believe how quickly eight years have passed. It makes me want to take more time and be more involved in every aspect of his life. Take the time to show him and teach him more.
 
It has truly been a blessing to watch this person grow. I appreciate his passion for drama and oh is he dramatic (he gets that from me). He has an enormous imagination, some mad video gaming skills and a great heart. I love this kid. He's my first and in a way he'll always be my baby. My big 4.5 ft tall 8 year old baby.
Logan is 8
Happy birthday to my sweet pumpkin. I love you and I am so happy and grateful God gifted me, you. I hope 8 is a great year for you!!!
Xoxo
Mommy
 
MINECRAFT CANDY POPS

I made these super fun and easy MINECRAFT Candy Pops from the youtube channel
Nerdy Nummies. You can watch the video on how to make these awesome treats by clicking on the link above.
Mine did not come out quite as good as hers. I was lacking the writing pens that she used and had to write tiny letter with a paint brush and chocolate. My chocolate seemed extra thick and that made it challenging to get a smooth finish. Overall, I would say considering the obstacles they came out really cute and most importantly they tasted amazing, were easy to eat and super easy to put in little bags and send home with the kids instead of big bags of junk.
I love Rosanna Pansino the host of Nerdy Nummies. I made another of her minecraft cakes last years for my son's 7th birthday and it came out really cute. Go checkout her youtube channel. Lot's of great baking tutorials for the video game lovers out there. Or at least for your children's love of video games in my case.
 
Have a blessed day to all


Tuesday, August 19, 2014

A song dedicated to my son: The Video Game Song

My son loves video games. I am sure there are a lot of people that could say the same thing. Video games are awesome, yes! They help to keep these mischievous little boys out of trouble and in sight for those mommy's that prefer to keep a mindful watch. They help with eye/hand coordination. They also tend to consume the minds and thoughts of those playing and it seems that video games are the only thing my son can think about sometimes. We had to make a rule that there is no talking about video games at dinner. He would go on and on about them If we would let him. Regardless of all the negative aspects that are associated with adolescent video gaming, there are still many positive benefits as well. Check out this article from Psychology Today about some of the benefits.

I tend to sing to my kids a lot. Well I tend to sing about everything. It drives them crazy, which makes me love it even more. So one day I was telling my son that he was going to game his life away and made up this funny little song. I would like to dedicate it to my son...against his wishes. And I sing it to him in a high pitched opera voice just to make it that much more fun.

I'm gaming my life away
If it was up to me
I'd spend all day in my underwear
playin' games
and I don't care about anything else

Mom Mom watch out
There's a Giant Mutant in Dead Trigger
If he gets me he will crash my helicopter
Just one more minute Mom,
there are zombies everywhere
Look at this .50 cal Mom
Isn't is awesome
I want to make a game called seven days to dead

There's a creeper coming my way
I'm using my new diamond sword to take him down
before he blows up my whole Minecraft town
I have to go mining for some diamonds and coal
I need to cook some meat in this oven I just built
I am going to use my enchanting table
to enchant my weapons and armour
Wouldn't it be so cool if we could build one of these roller coasters for real?
The creepers are coming so we have to hide
It is getting dark, we have to go inside

Mom, come look at my new cool armour
In Skyrim I can be a Nord...They also have these awesome Orks 
I have to find the EnderDragon
I'll use this bow with the enchanted flame
To set the dragon on fire and get loads of experience
and the portal opens and I get to go back home 

I'm gaming my life away
I can't tell you what day it is today
There is nothing that I'd rather do
than spend my day in front of the tube

I've got my wireless controller
I've got my favorite pillows on the sofa
I have no care in the world
cuz I'm building my own land and I have servents
that follow me around and do what I say
This is my favorite thing to do and
I never want to live in reality

                 The End
 
This is basically what my son sounds like on a daily basis. He talks a mile a minute (I know he gets that from me) and could never run out of things to talk about....as long as it is about video games. If it isn't about a video game he only talks a little less.

I sang this to my son and told him that I was going to write this song for him and he told me "you are going to sing this song to thousand of people and embarrass me if you tell them I am in my underwear." I told him, well it's the truth Darling and yes I am going to write it. So, much to his dismay I have dedicated this Video Game Song to my sweet boy. I love you to the moon and back.

Your Mom


Wednesday, August 6, 2014

Frozen baby food mini melts

Are you looking for an easy and healthy snack for your baby or maybe something that might soothe those little teething gums? If so, then these super easy yummy little mini melts are going to make both you and your baby happy. 
Both my boys started teething really early and it can be challenging to find just the right thing that makes your baby happy. Well these little multi-purpose frozen bites sure helped. Not only are they super simple to make, but there's only one ingredient. If you are already feeding your little one baby food then you are already set. 
 
All you have to do is decide which baby food flavor(s) you want to use. You can try them all if you want. I like to use the fruit ones because sucking on vegetables just doesn't seem as fun to me. There are so many fruits to choose from. You can make a lot of these little melts with just one jar of food. 
I only used half a jar and ended up getting about 40-50 melts out of it. I try to make them tiny, like the size of an m&m. Since my son has his front teeth the cold feels weird to him. So if they are small it doesn't bother him so much. 

Okay, let's get started. It's so simple. 

Here is what you will need:
4oz jar of baby food (ANY FLAVOR)
a small baggie (TO PIPE THEM OUT)
A plate or cookie sheet
parchment or wax paper
a freezer
 
Lay the wax paper on you plate or cookie sheet (the flatter the surface the better) and fill the baggie with the baby food. Push the food into the corner of the bag and twist the end tight to keep it all in. I only use half a jar at a time. Snip a teeny tiny hole in the tip of the baggie.You can always go bigger. 
Begin to pipe out tiny little dots onto the sheet. Whichever size you feel is best for your little one. Try to keep them from touching each other so they will freeze separately. 
 
After you have piped them all out, stick them in the freezer. I would give them a good 45 minutes to 1 hour to freeze. After they are nice and icy then you can use a butter knife or small spatula to scrape the dots off the paper and then you can store them in the freezer by re-using the baby food jar
That's it. Whenever you want to give your baby a little healthy snack or just something to numb the gums a little, these will be ready and waiting to save the day. 
I hope you find these as fun and easy to make as I do and that your baby finds them just as enjoyable and soothing as mine do. Thank you for joining me.
Enjoy your journey in the kitchen.

Blessing to all

Sunday, August 3, 2014

Love and Respect

We live in a world with a near 7 billion people. That is 7 billion opinions and personal views on life. Why are we still arguing about who is right and who is wrong. Why are we still trying to enforce our own opinions and views on other people as their own and if these beliefs are not accepted, then we immediately condemn and scold for betrayal. But don't anyone dare to enforce their opinions and beliefs on you. Right? It sound ridiculous doesn't it?

When are we going to evolve as a species and society? When will people stop wasting their time and the time of others with their arguing and complaining. We all need to work together to do what is best for the greater good as a planet and species. We Do Not need to be arguing about religious beliefs, political views, the way we parent and raise our children or whether or not the chicken or the egg came first.

No matter how you feel about what is right or wrong, there will always be someone to challenge your belief. There will always be someone to think that murder, abuse and molestation isn't wrong, regardless of how obviously wrong it is. There will always be someone to believe differently. It is madness trying to rationalize with some people and there will always be people like that. The point is that as a society we will never ever ever believe all ONE WAY. We just won't. So why do people waste their own time fighting, arguing and condemning others about how they believe. You are only wasting your own time. No one Else's. It is really for our own individual benefit that we learn to accept other people for who they are and accept that other people simply won't believe or do thing the way that you do.

We are fighting an endless battle when we argue about how we should believe and do things. It goes back to childhood and I am sure your mother told you this at least once, "treat people how you want to be treated." How we have not figured this out by adulthood is beyond me. If you don't want someone telling you what to do, how to believe and how to live your life, then why would you try to impose that on someone else. I know that I believe the way I feel in my heart and I would never want someone telling me that I couldn't believe the way that I want too. Therefore, I would never judge you for how you believe. By all means, if you want to worship a tree, then who am I to judge you? You do what you have to do to get through your journey. It has nothing to do with me. It doesn't affect me. That is your choice. So why do people feel like they have to control everyone?

Control. That is what it boils down too. To control people is the lowest form of abuse there is. The only thing that you should try to control is yourself. We all need to learn how to control our thoughts and stop trying to control everyone Else's. The older I get the more understanding and compassionate I have become towards others. The more I want peace. The more I work on myself and learn and grow, the less I care about the actions of others or trying to control others. It is completely crazy, unreasonable, irrational chaos to think that we can make everyone believe one way or think one way. When we can all come to terms with the FACT that we will never all believe the same way, the sooner we will come as close as we possibly can to Peace. That is what makes us all different and unique. Our ability to think for ourselves is what sets us apart from every other living thing on this planet.

In the big picture does it really matter that people don't believe like you? Do you really really care? Or are you just angry that you are not in control? The next time you get mad or angry and feel like judging and being nasty, ask yourself, "why am I even mad. Is it because I am not in control?" When you learn to watch what you think and take control of your mind instead of letting your mind control you, you will begin to really grow and see how ridiculous your behavior has been. I know because I have always struggled with judging and I was a control freak. I am learning to let go. When I see people get so angry over the most insignificant things, I have to laugh. That used to be me and now I can see how foolish I used to look and act. It is not worth it to fight and argue.

Next time you don't agree with someone try to put yourself in their shoes. Try to not judge. Accept it for what it is. Don't verbally abuse the mother that decides not to get her children vaccinated. It isn't any of your business or your problem. If you want to get your child vaccinated, then do it. Your child will be fine because you feel that vaccinations make you kid safer than the kids that aren't. So don't feel like you need to go the extra mile to condemn the other mothers who choose to raise their children the way they want. What if I told you vaccination were no longer an option and no one would be vaccinating their children. All the mothers who don't vaccinate will be jumping for joy and how will you feel? No one likes being on the other side of the equation but are quick to point fingers. Stop it. It is none of your business. It is not your place to judge. This applies to everything.

That is just one tiny example of the stuff we fight and argue about. Same sex marriages. It goes against what I personally believe but I would never judge you. To be honest I don't care. What you do is your business. What if everyone was with the same sex partner and it was illegal to marry the opposite sex? I would fight for my right to love who I wanted. Wouldn't you? Can we please just stop all of this fighting and arguing. It is madness.

We are a brilliant and strong species who can do anything we set our minds too. Look how far we have come in the past 200 years. We have evolved in leaps and bounds in just the past 30 years. We are above all this petty fighting. You live and believe the way you want and respect that every individual should have the same right. No matter what. We all have consequences for our actions and we all have to make our own choices and make this journey on our own. We are all doing the best we can. I watch people all the time, everywhere I go and sometimes people can be so mean and hateful. It usually comes from a place of hurt in their heart that they have been holding onto for so long and they take their pain out on others. But is isn't necessary. They need love more than anyone. Remember that everyone you meet is fighting their own battle and you have no idea what hurt they harbor inside of them. Show them love, kindness and compassion. Even if they don't accept, you will be out nothing. You will know that you did the right thing and when enough people show love to that individual they will begin to soften and learn that love is the answer. It works.


One day, we will figure it out. In the meantime can we all just stop wasting time and energy being mean and hateful. Just love. Be love. Extend love. Help others. Accept others. If each of us worked on ourselves and took control of our own minds and only offered love to one another, we would one by one make this world a little better. Just think about it. Make a conscious effort to only show love and not judge. You will quickly see how much better you feel about the world and yourself. Just imagine if we each took responsibility for ourselves and just did this one thing. I can see the difference in my life and I know the difference it would make in yours. I know it is easier said than done, but it starts with you and it starts with me.

Blessing to all