Showing posts with label baking. Show all posts

Monday, April 6, 2015

Spring Sunshine Cake | Strawberries Lemons & Vanilla Bean Buttercream

 
Spring has arrived!
Besides the longer days, warmer weather and abundance of bugs trying to invade my home, my lovely coral roses tell me so.
I have been frequenting my local produce store a little more often and stocking up on lemons, strawberries and other yummy bright fruits and veggies. Spring is my favorite time of year. I love all the beautiful colors and yes, the abundance of nature that blossoms too. I felt inspired to make something with all this spring-time bounty. So, I decided to make a cake that reflected how I am feeling.
I came up with this sweet and tart, creamy sunshine cake made with lemons, strawberries and Madagascar vanilla beans.
I don't have a recipe to share just yet, because I was just experimenting and need to do some tweaking first. But I started with a basic yellow cake from scratch that was infused with lemon zest, coconut/pineapple juice and of course some fresh lemon juice.
I usually don't make my cakes from scratch because I find them to be very dense and box cake mixes always seem to be light and fluffy. However, I found a basic yellow cake recipe and it looked promising. I added a few of my own ingredients to mix it up and I will say that it did come out a little denser than I would have liked but overall it was good and had good flavor.
{This is where those tweaks need to be made}
The Texas Bohemian | Spring Sunshine Cake | Strawberries Lemons & Vanilla Bean Buttercream
I do like that the cake mix from scratch stayed fairly level and I didn't have to cut a hug mound of cake off the top to get it level, like I would have had to do with a box mix. I think they add massive amounts of baking powder to the box mixes.
{Just a guess}
The Texas Bohemian | Spring Sunshine Cake | Strawberries Lemons & Vanilla Bean Buttercream
After I let the cakes cool, I poked holes all over the cakes and basted them with this lemon and vanilla bean simple syrup that I made. I did this to make sure that the cakes were extra moist and also to infuse them with a little extra flavor. Doing this was very helpful and it did not make them soggy at all. I only used a few tablespoons on each cake.
The Texas Bohemian | Spring Sunshine Cake | Strawberries Lemons & Vanilla Bean Buttercream
Once the syrup soaked into the cakes, I then made a strawberry and lemon reduction that I used to fill the middle layer with. I usually don't like fruit fillings in the middle of my cakes but since I wanted this cake to represent some of the yummy fruits of Spring and not overwhelm it with buttercream, I felt this would really make it delicious.
The Texas Bohemian | Spring Sunshine Cake | Strawberries Lemons & Vanilla Bean Buttercream
I covered the whole middle layer with the reduction and it almost looked like a strawberry glazed cheesecake. I could have left the cake like this, gone no further and it probably would have tasted like heaven on it's own. But I didn't . . .
The Texas Bohemian | Spring Sunshine Cake | Strawberries Lemons & Vanilla Bean Buttercream
I added the second layer of cake and pressed firmly on the top which allowed some of the strawberries to ooze and drip down the sides.
{kind of like blood. LOL. I kid}
The Texas Bohemian | Spring Sunshine Cake | Strawberries Lemons & Vanilla Bean Buttercream
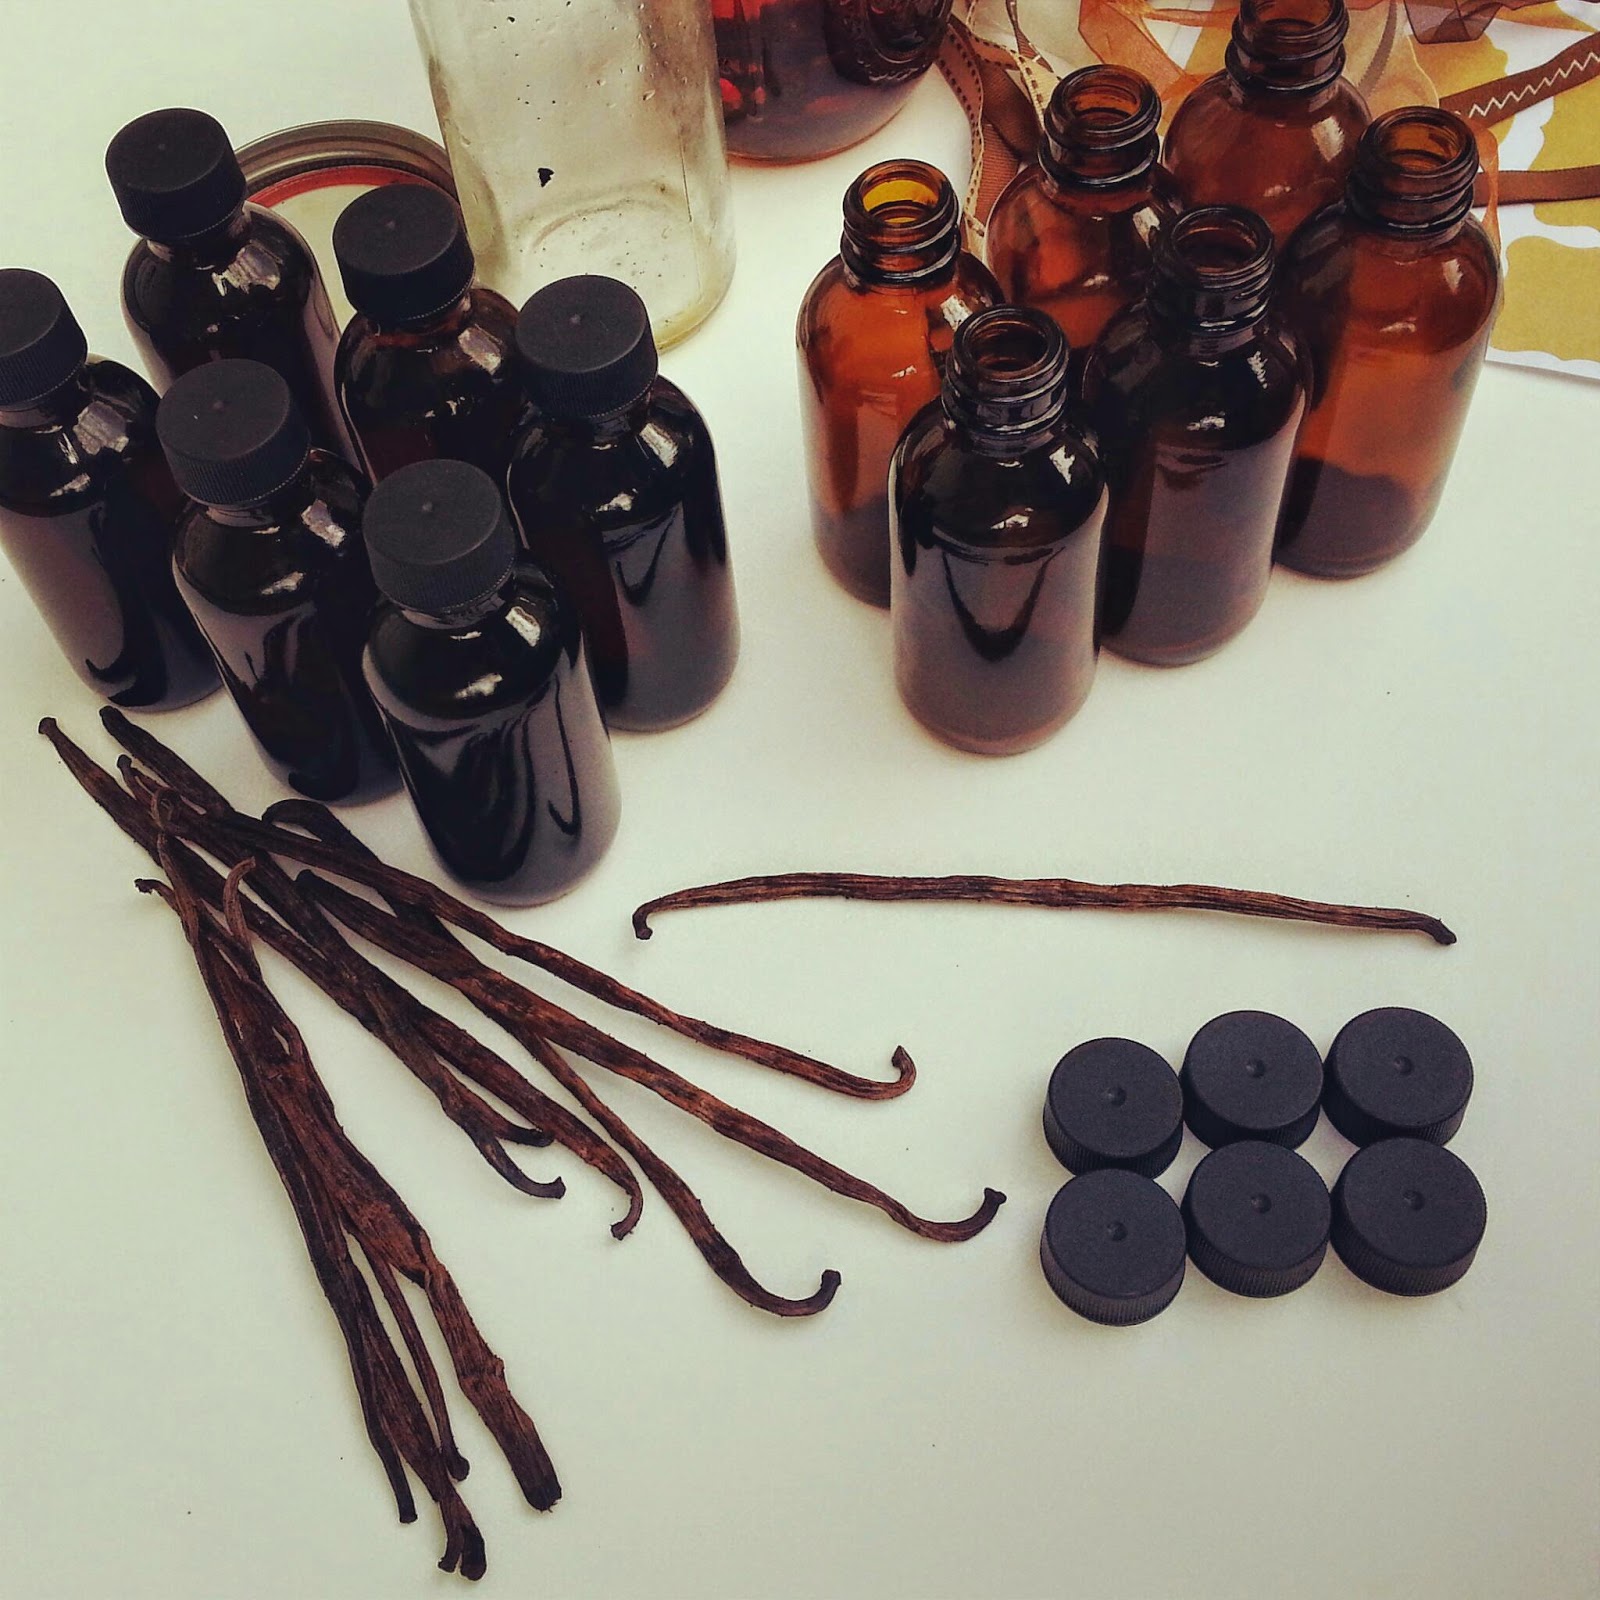
I added my homemade Vanilla Bean buttercream just on the top of the cake and used a spoon to create this swirl pattern. You can see all the specs of vanilla bean seeds in the buttercream and it just seems to add a little extra sweetness to the buttercream as opposed to just using a vanilla extract.
Oh how I do love Vanilla Beans. I love the way they look, smell and taste.
I can't say the same for my fiance' because he said it looked like I put two sticks on the top of it. Lol
{Not everyone gets it}
But that is okay. I like the way the vanilla beans and the curls of lemon peel looked on the top. I also added a couple of my coral roses to the top as per my first picture. It just looked so good with the colors. I had too.
The Texas Bohemian | Spring Sunshine Cake | Strawberries Lemons & Vanilla Bean Buttercream
Overall I am happy with the way my cake came out and besides needing a couple of tweaks in the cake mix, It was really yummy, bright and fruity.
Think of sunshine in your mouth.
That is what I was going for after all.
I hope this cake gives you a little inspiration to get in the kitchen and make something yummy of your own. If not to kick off Spring, then just to stuff your face with. In moderation of course. I ended up sharing this with the neighbors because I certainly couldn't eat it all, no matter how much I may have wanted too.

Blessings to all
 

Tuesday, March 10, 2015

How to make easy individual mini quiches

 I love breakfast foods. However, I tend to have a hard time waking up and eating a meal right away. I like to enjoy a couple cups of coffee before I even get hungry and I find myself eating more breakfast foods at other times of the day.  However, my one year old is ready to throw down as soon as he wakes up. Since I have no appetite when I wake up, it can be challenging to cook a meal. So, I went on the search for some easy breakfast foods that I could pre-make and even possibly easily reheat for my little one in the morning. I have seen these little quiches around and thought I would give it a try. One of the biggest appeals for me is that they can be pre-made, refrigerated, frozen and then reheated again. These are also healthy if you use fresh healthy ingredients, like free-range cage-free eggs and veggies. However, use whatever your little heart desires. I won't tell. I already know how to make a quiche and I certainly know how to make an omelet. This dish combines the two, except there is not a crust, which is a good way to cut back on even more calories. 
Here are the ingredients you will need for this recipe. It Is very simple.
 
Ingredients:
8 fresh eggs (if possible cage-free)
3 tbsp. Half&Half (you may also use heavy cream and even milk)
1/2 c diced tomatoes
1/2 c shredded cheese (I use sharp cheddar)
1/2 c fresh chopped spinach
1/4 turkey lunch meat (you may also use ham or omit meat all together)
a pinch of salt to taste
 
Utensils:
Large mixing bowl
Whisk/Fork
Measuring cups/spoons
Non-stick muffin pan
knife
cheese grater
Directions: Preheat oven to 350 F
 
Using a whisk or fork, scramble the eggs in a large bowl. Add cream and salt.
Whisk again! Now add the rest of the ingredient all at once and whisk until thoroughly combined. You want to make sure every quiche gets a little bit of everything in it. 
Once the mixture is combined, you can pour some into each individual muffin spot. I filled mine up to the top. I also used a large Pyrex glass measuring bowl, which has a spout and handle and that made it really easy to pour directly from the bowl into the muffin pan. This recipes yields 9 individual quiches. I also added a little extra cheese to the top of each quiche before I put it in the oven. This of course is optional but I noticed it makes it a little more moist and yes, a little yummier.
Bake the quiche in a 350 F oven for 25 minutes or until cooked thoroughly and cheese is melted. 25 minutes cooked my quiche perfectly and the cheese melted just right. Allow them to cool for a few minutes before eating them because they will be steaming hot.
Voila! 
A perfect little mini quiche!
You can store the left overs in an air-tight ziplock baggie or container and put them in the refrigerator. I wouldn't leave them in the fridge for more than a day or two. You may also freeze them and heat them up as you need them. If you double this recipe you can make 1.5 dozen and store a bunch in the freezer for quick breakfasts. When you are ready to use them from the fridge, you can microwave them for about 30 seconds and from the freezer about 1 minute. I made these yesterday morning and refrigerated them. I took one out to eat this morning and heated it up in the microwave and it tasted just as moist and delicious as when they came out of the oven and that is what I like about these.
 
Here are a few other ingredient ideas to use when making these quiche.
The options are endless:
Mushrooms, onions, chives, swiss cheese, bacon, ham, peppers
 
As always, have fun in the kitchen and Enjoy!


Friday, February 27, 2015

Simple chocolate cupcakes

 I love those days where you wake up and the sun is shining and the birds are singing with glorious abandon. This morning was not one of those mornings. It is cold, gloomy and drizzling outside. However, a few days ago I woke up and it was an absolutely beautiful day. I opened up the windows in the house and let the fresh air in. I did a little house cleaning and clothes washing.
All of this cleaning got me a little hungry and I was also a little inspired to bake something yummy and sweet. I am trying to consume less sugar for obvious reasons but also because I have a cute little dress and a swimsuit that I need to fit into in a few months and I have to bake less or just find ways to bake a little more healthy.
So I decided to make some cupcakes.
Chocolate Cupcakes!!!
I don't like to use box mixes because they are usually full of unnecessary crap and are not very healthy, but I happened to have one on hand.
So, I made some chocolate mix and used applesauce instead of the oil to make it a little healthier and I also used farm fresh cage-free eggs. I used these green Wilton cupcake holders and unfortunately they stuck to my cupcakes really bad, but they sure looked purdy!
Then, I sprinkled a generous coating of confectioners sugar all over them.
I think they came out great and I realized that I love chocolate cupcakes with just a touch of sugar and not a heaping layer of icing. Not that I won't still thrown down on some big ole icing covered cupcakes, but It is a nice change to enjoy a simple rich chocolate cupcake.
 
Blessings to all
 

Tuesday, February 3, 2015

The best blueberry muffins I have ever eaten | Recipe

There is nothing quite like fresh homemade blueberry muffins for breakfast. Fresh blueberry anything, actually! Growing up my mom always made the Betty Crocker blueberry muffins from a box. I always loved them. I liked to help make them and draining the blueberries was especially fun because how many foods do you get to play with that are blue? I would smother my muffin in butter and gobble it up. I could really throw down when I was younger.
As I grew up, I carried on the same tradition and made my blueberry muffins the same way. From a box! Along the way I have tried to make blueberry muffins from scratch here and there, but they always came out really heavy and cakey or too bland. I had given up on making them.

About a week ago I came across this blueberry muffin recipe and honestly the muffins on her blog looked so good that I thought I would give it a try. Little did I know that I made the best decision of my day. I did have a whole box of fresh blueberries that needed a higher purpose after all. I am glad that I made them because they are THE BEST BLUEBERRY MUFFINS THAT I HAVE EVER EATEN!!! Did I yell that?!?!

I mean it! These are so fluffy and moist with just the perfect amount of berries and sweetness. I love the bursts of warm berries as you bite into these. I like that the recipe called for brown sugar instead of the regular granular sugar. I think that made a big difference. The sweet and cinnamon crumble on top to top it off was perfect. It didn't take me long to throw these together either, which I like. This recipe also calls for buttermilk, which is super easy to make if you don't have any and she also explains how to do that on her blog. She really took the time to make a really great post with detailed instructions. So I will let her do the teaching on this. You can find the recipe for these amazing muffins at this really cool blogged called Simply Delicious.
She even has those awesome printable recipe cards on her page, which makes things so much easier.
 
Just a quick once over of the ingredients for this recipe:
MUFFINS:


  • 2 1/2 cups all-purpose flour
  • 1 teaspoon baking soda
  • 1 teaspoon baking powder
  • 1/2 teaspoon salt
  • 1 1/4 cup brown sugar
  • 1/2 (1 stick) cup unsalted butter, softened
  • 1 large egg
  • 2 teaspoons vanilla extract
  • 1 cup buttermilk
  • 1 1/2 cups fresh or frozen blueberries, plus 1/4 cup to press on top
CRUMBLE:
  • 2 teaspoons unsalted butter, melted
  • 1/2 cup granulated sugar
  • 2 teaspoons ground cinnamon
Yield: 15 Regular Muffins
Prep Time: 10 minutes
Cook Time: 15-20 minutes
Total Time: 30 minutes

After you make these yummy little blueberry babies, smother them in butter and enjoy them with a glass of milk. That is my favorite way to eat them. I hope you get a chance to make these muffins and that you enjoy them as much as I do. I have a new favorite blueberry muffins recipe and I will be holding onto this one for a while.
Enjoy!
Blessings to all


Check out my previous post on
How to freeze your leftover berries
http://thetexasbohemian.blogspot.com/2015/02/how-to-freeze-berries.html


Thursday, December 25, 2014

Merry Christmas

Well another Christmas has come and almost gone. It was a really lovely holiday season with our family.
As usual, we had many places to visit. Last night we went to my Aunt's house in Floresville, Tx that is on my Father's side of the family. That is where these beautiful sunset photos of my guys were taken. I love a good Texas sunset. As you can tell it is beautiful and peaceful country. I love being outdoors and away from the from hustle and bustle of the city because I always find that being around nature brings me peace. There is a certain harmony and balance in nature that always reminds me to just be and let it be. 
This is the kind of "White Elephant" that you hope to end up with at the end of the night. Every time I participate in a white elephant, I tend to bring alcohol of some sort. No one ever turns down a gift filled with little bottle of booze, chocolate, a few mints and a delicious all-natural peppermint lip balm. No One!!! I wish I would have just kept this bag for myself. That is the fun of the game!
I made homemade marshmallows for the first time and I must say that it was the messiest and stickiest thing that I have ever made. That means that they were super yummy. I made up a big cup of hot cocoa full of milk chocolate and white chocolate chips in one of my old Starbucks mugs. I plopped in a few extra big and fluffy homemade marshmallows, sprinkled with a little cinnamon and enjoyed one of the best cups of hot chocolate that I have ever had. I mean that thing was good. I used the Alton Brown marshmallow recipe that has been circulating around everywhere. It was a good but super messy first experience. I plan to make these again and fix a few of the mistakes I made in this recipe. All I can say is they make for one good cup of cocoa.
Also, for Christmas I tried my hand at homemade vanilla extract. I never knew how easy it was to make your own extract. I don't think most people know just how easy it is to make either. I really loved these cute little brown glass bottles that I got and I just found some cheap labels and a ribbon assortment at Hobby Lobby and threw these little guys together. Everybody loved them. I got to learn to make something new. I got to save money and I was able to give my friends and family something that I put my heart into and It felt good sharing with them. I will continue to make my own extract from here on out.
We started a tradition of decorating a gingerbread house as a family last year. We did it again this year and It was fun as usual. The icing they include in these little kits is pretty damn good. I have a hard time not eating it. The kit we found this year was way better and came with two gingerbread men as well as a tree and a few other extras that helped make our little house so awesome and yummy. Decorating a gingerbread house as a family is a great way to spend some extra time together and get creative as a family. Everyone will be so proud of the result. Then maybe everyone can eat it.
Now onto New Years Eve. Hopefully a little dancing and celebrating another year of health, happiness and love. Merry Christmas to everyone from my family to yours.
 
Blessings and Love to all
 

Sunday, December 21, 2014

Cinnamon Rolls from Heaven


I always wanted to make cinnamon rolls from scratch but was a little intimidated with the task. The amount of time that I thought would have to go into making those gooey little buns was daunting. I put it on my list of things I want to learn to make from scratch and kind of forgot about it. That was until I came across this recipe that seemed too good to be true. There was an easy video tutorial to follow along with and everything. Score! I really like the lady who made the video. Her name is Jenny. She's a pretty woman, probably in her 60's, quirky, blonde and for some reason seems so familiar to me. You want to know why this woman seemed so familiar to me? 
Because she is Jenny Jones.


The former talk show host Jenny Jones. I learned how to make some of the tastiest and easiest cinnamon rolls ever from a former 80's & 90's drama talk show host. I didn't even know she had a youtube cooking channel. Did you know? I think I like her better as a cooking show host than the other.

After I stopped saying, "No wonder she looks so good, It's Jenny Jones" then I was able to focus on making these yummy buttery rolls. Not only is this recipe fairly easy to execute but she has cut out about half the butter and sugar of your regular cinnamon rolls. I would have made them and totally enjoyed them even if she had doubled the butter and sugar, but I honestly was just as satisfied with these and can't complain. I don't think you will notice either. Just think of it as a gift to yourself.

To make it a little easier I have gone ahead and laid out the basic tools and ingredients that you will need to make these fabulous ooey gooey sticky sweet rolls but I think you will find it most helpful to follow her 15 minute instructional video to get the full grasp on what is supposed to go down. Besides, you need to go see Jenny Jones do a cooking show. It is wonderful. Actually I find her very relaxing and kind of funny. Especially now that I know who this random Jenny Can Cook gal is.

What you will need:
TOOLS
Stand Mixer (works the best)
Measuring cups and spoons
large bowl
silicone spatula
8" round baking pan
Floss if you got it (or large knife)
plastic wrap
rolling pin

Ingredients
DOUGH
1 1/2 c. Flour + 1/4 c additional flous
1/4 c. sugar
1/2 tsp. salt
1 pkg yeast
1/2 c. warm milk
3 tbsp. Canola Oil
1 egg

FILLING
1/4 c. Brown sugar
2 tsp. Cinnamon

GLAZE
1 c. Confectioners Sugar
1/4 tsp. Vanilla Extract
2 tbsp. Milk
milk

*I added 2 tbsp. cream cheese and 1 tbsp. of butter to my icing. What can I say? I love a rich creamy cream cheese frosting. Just a suggestion!


You can find the recipe and video tutorial here and watch how easy it is to make these big, yummy, fluffy cinnamon rolls all by yourself. I would watch the video once all the way through and take it all in. Then, you can prepare everything and when you are ready you can follow along with the video again while you are actually making them. I hope you get the opportunity to check out the video and Jenny as well as try out this recipe. It is a great one. Enjoy your journey in the kitchen. If you're not having fun then you are not doing it right.

Blessing to all


Sunday, December 14, 2014

Pretty Petit Fours

These little Alice in Wonderland inspired petit fours are so light, airy and delicious. They literally melt in your mouth. Ok, so before you get too excited about this, I don't have a recipe ready for these delicious little tea cakes. I just love them so much that I wanted to share them and could not wait any longer. I will of course try to get one together.

I remember watching Alice in Wonderland when I was a little kid and seeing Alice eat that precious little blue round cake that said, "Eat Me" on it. I was like, "I want a bite" lol. Then she grew like 20 feet tall and broke through the roof. But I still loved the way that lovely little bite sized cake was stored perfectly in that little glass box and it all just seemed so magical.

I have also always loved petit fours and tea cakes and wanted to make my own. I have attempted making petit fours a couple of times before and they can be a little tricky. I will say that what worked best for me was making a large sheet cake and using a small round cookie cutter to cut out the little cakes. Then I used a light glaze and smothered them over a grated cookie rack.

My favorite part about making sweets like this is the creativity that happens. It is like food art.
IT IS Food Art!
I love food and I love art. It is a win win. I have been passionate about food and art since I was very young. So to get to combine the two is really fun for me. I like to write inspirational sayings on my food sometimes too. Like Love. I write that one a lot, lol.

I will do my best to get a recipe together for these as soon as possible. Let these be inspiration as to little cakes to come. As always, Enjoy your journey in the kitchen. The more you practice, the more you learn. It is a blast either way.

Blessings to all


Friday, November 21, 2014

Make your own Christmas ornaments

For the past 6 years or so I have been using the same old red, gold and silver nautical stars and spiral ornaments that never fail to leave glitter all over my floor and kids. This year I decided that we needed a change and would do something totally different. I am not one to go out and drop $200 on a whole new ensemble for my tree. So I did what any one would do and I decided to make my own Christmas ornaments.


Not only do I get to save money but It is also a great way to get the kids involved in a fun family project. We had so much fun making these cute little ornaments that I have decided that we will make it a yearly tradition.

In the past I have used a salt dough recipe to make things such as this but I was doing a little scientific research on Pinterest and I found this new recipe popping up consistently. So I decided to give it a shot. This recipe for clay only uses three ingredients. Cornstarch, baking soda and water. I found it to be a really easy recipe and not too messy.

So this is what you will need to make this dough recipe and how to make it.

1/2 cup Cornstarch
1 cup Baking Soda
3/4 cup of Water

You will also need:
a medium saucepan
a silicone spatula (or stirring/scraping utensil)
a bowl and tea towel
silicone sheet or parchment paper
baking sheet
paints and decorations
1 drinking straw (It's to make a hole to hang your masterpiece)
String/yarn/twine

Preheat oven to 175 degrees Fahrenheit.

First, combine all three ingredients into your medium saucepan and cook on medium-low heat, stirring constantly. Once the mixture has combined and come together in a thick mashed potato-like consistency. It usually takes about 7-10 minutes for the dough to thicken. Once it gets to that state then you can transfer it to a bowl and cover with a tea towel and allow it to cool to room temp before handling.
 

After the dough has cooled you can transfer to a clean counter top and knead to get all the lumps and air bubbles out. If the dough is a little sticky then you can add a little corn starch to it. Roll the dough to about 1/4 inch thick and use cookie cutters to cut out your ornaments. Don't forget to use the end of a straw to punch out little holes to hang your ornaments. Transfer the shapes to a silicone or parchment paper covered cookie sheet and bake at 175 degrees for an hour, turning over once halfway through. Once they come out and have cooled, you can decorate and paint them. Add your string of choice through the hole in the ornament and tie it in a knot. Now you can hang your special ornaments on your tree and enjoy them for years to come.

Some other great ideas to try out when making your ornaments are carving initials and names into them. You can also use stamps to put impressions on them. You can add beads and glass pieces to them as well. Also, try spray painting them using stencils.

As always, have fun in the kitchen and I hope that you enjoy this recipe and make it a tradition in your home.

Blessings to all